"Simple Homemade Coffee & Tea Gelato"

So, as is my usual, I decided to play around in the Kitchen again..

What I ended up creating, for me an my Baby, were two "Three Ingredient Gelato's

Well, truth be told, they went a little beyond three ingredients. I couldn't help it..

The First one was a scrumptiously tasty "Matcha Green Tea Gelato" followed by a delectably delicious "Chocolate Chip Espresso Gelato"

Now I know what you're going to say, there's four ingredients in Espresso Gelato-but really that's only cause I couldn't help tossing in several handfuls of mini semi sweet chips at the end, I mean could you have if you were me..

So each of these refreshing frozen treats involved Heavy Cream whipped til thick peaks formed an kept cool..

Then I mixed my other ingredient with either the home-brewed Espresso that I cooked down to thicken, or the Matcha Green Tea Powder I mixed with hot brewed Green Tea to liquify..

Folding each into its own batch of Whipped Cream, I then poured them into containers and put them into the freezer to set for a few hours..

Mmmm, they were both unbelievable..

So thick, rich and creamy tasting; and so easy to do as well..

The Espresso one was especially good; such a strong roasty smooth coffee flavor with the chips just adding that lil extra something special..

Of course I could be biased due to my love of all things coffee, think I could exist on it an nothing else some days. Lol..

But really both were excellent; have loved green tea ice cream since eating it at Bonbori's Sushi as a kid, so very much enjoyed both flavors immensely..

Definitely a Delish Dessert to make again as the warm summer days approach..

"Espresso Chip Gelato"

Ingredients:
4 cups whipping cream (3-4 tubs sugar or fat free cool whip)
Can sweetened condensed milk
6 tblspn instant coffee
3 tblsps espresso
1 tsp vanilla extract
Half cup or more mini semi sweet chocolate chips if desired

Directions:
1. Thaw Cool Whip or make homemade Whipped Cream..
2. Mix Instant Coffee with 3 tablespoons of brewed espresso or coffee..
3. Mix Sweetened Condensed milk with Espresso mixture, vanilla extract and heat in microwave for approximately 30 seconds; then stir to combine and set aside to cool..
4. Once Espresso mixture cools, fold into Whipped Cream or Cool Whip and mix lightly together until fully incorporated..
5. Finally add in mini semi sweet chocolate chips and fold together..
6. Pour into Tupperware and cover and cool in freezer at least three hours before serving. Keep in freezer to store..

"Green Matcha Tea Gelato"

Ingredients:
4 cups whipping cream (3-4 tubs cool whip)
Can sweetened condensed milk
7 tsp's green matcha powder
6 tblspns brewed green tea
1 tsp vanilla extract
2-3 packs stevia or 3 tblsps powder sugar
4 drops green food coloring if desired

Directions:
1. Thaw Cool Whip or make homemade Whipped Cream..
2. Mix Matcha Tea Powder with 6 tablespoons of brewed green tea..
3. Mix Sweetened Condensed milk with Matcha Tea mixture, Stevia, vanilla extract and heat in microwave for approximately 30 seconds; then stir to combine, adding green food coloring if desired and set aside to cool..
4. Once Matcha mixture cools, fold into Whipped Cream or Cool Whip and mix lightly together until fully incorporated..
5. Pour into Tupperware and cover and cool in freezer at least three hours before serving. Keep in freezer to store..
"Post Thanksgiving Hangover"

I want to say that I just love entertaining for family and friends. I mean, truly love it.
So much so that I can be a little much for my beautiful Baby to handle, because I want everything to be perfect and go exactly as I envisioned especially with how it all looks and tastes..


So for this past Thanksgiving holiday, here in the US, I most definitely was more then a little anxiety ridden. I say this because not only was I doing a decent amount of cooking myself, but it was also going to be one of the first Thanksgiving dinner in our new home in quite a while..

Well I have to say that things most assuredly did not go perfect (as far as my vision) but in the end were perfect despite me and my worry. (I can be more then a little silly)


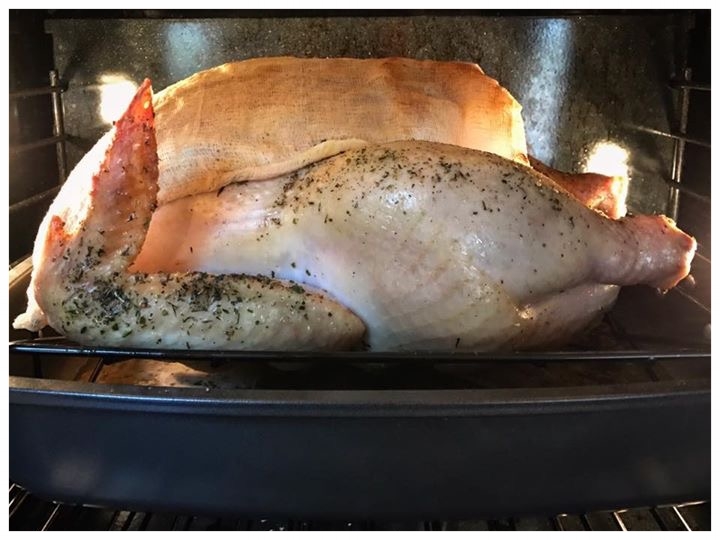
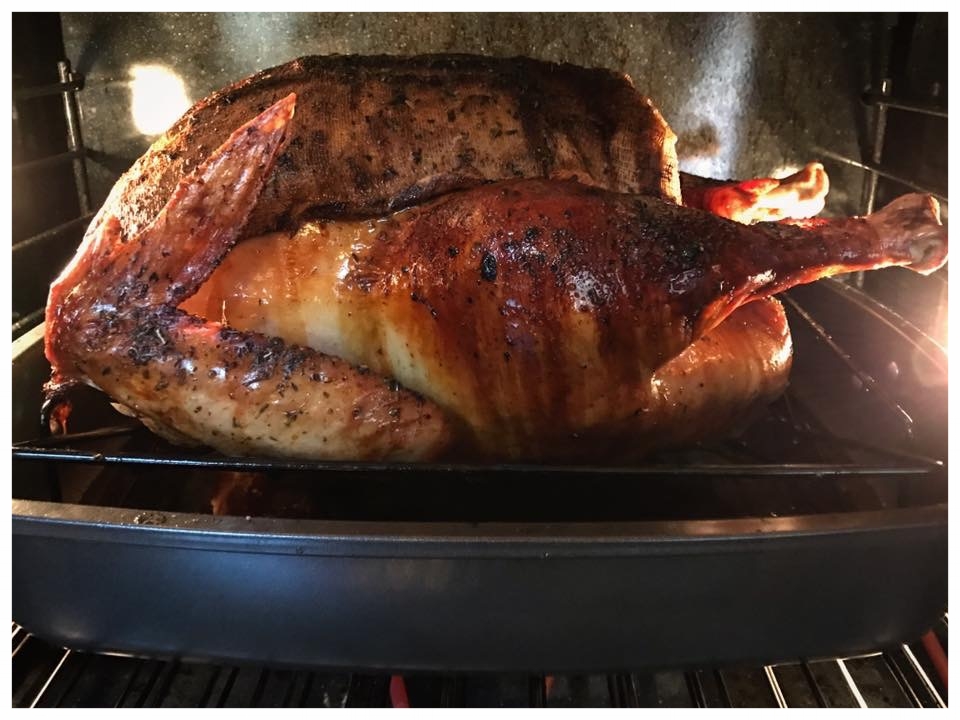
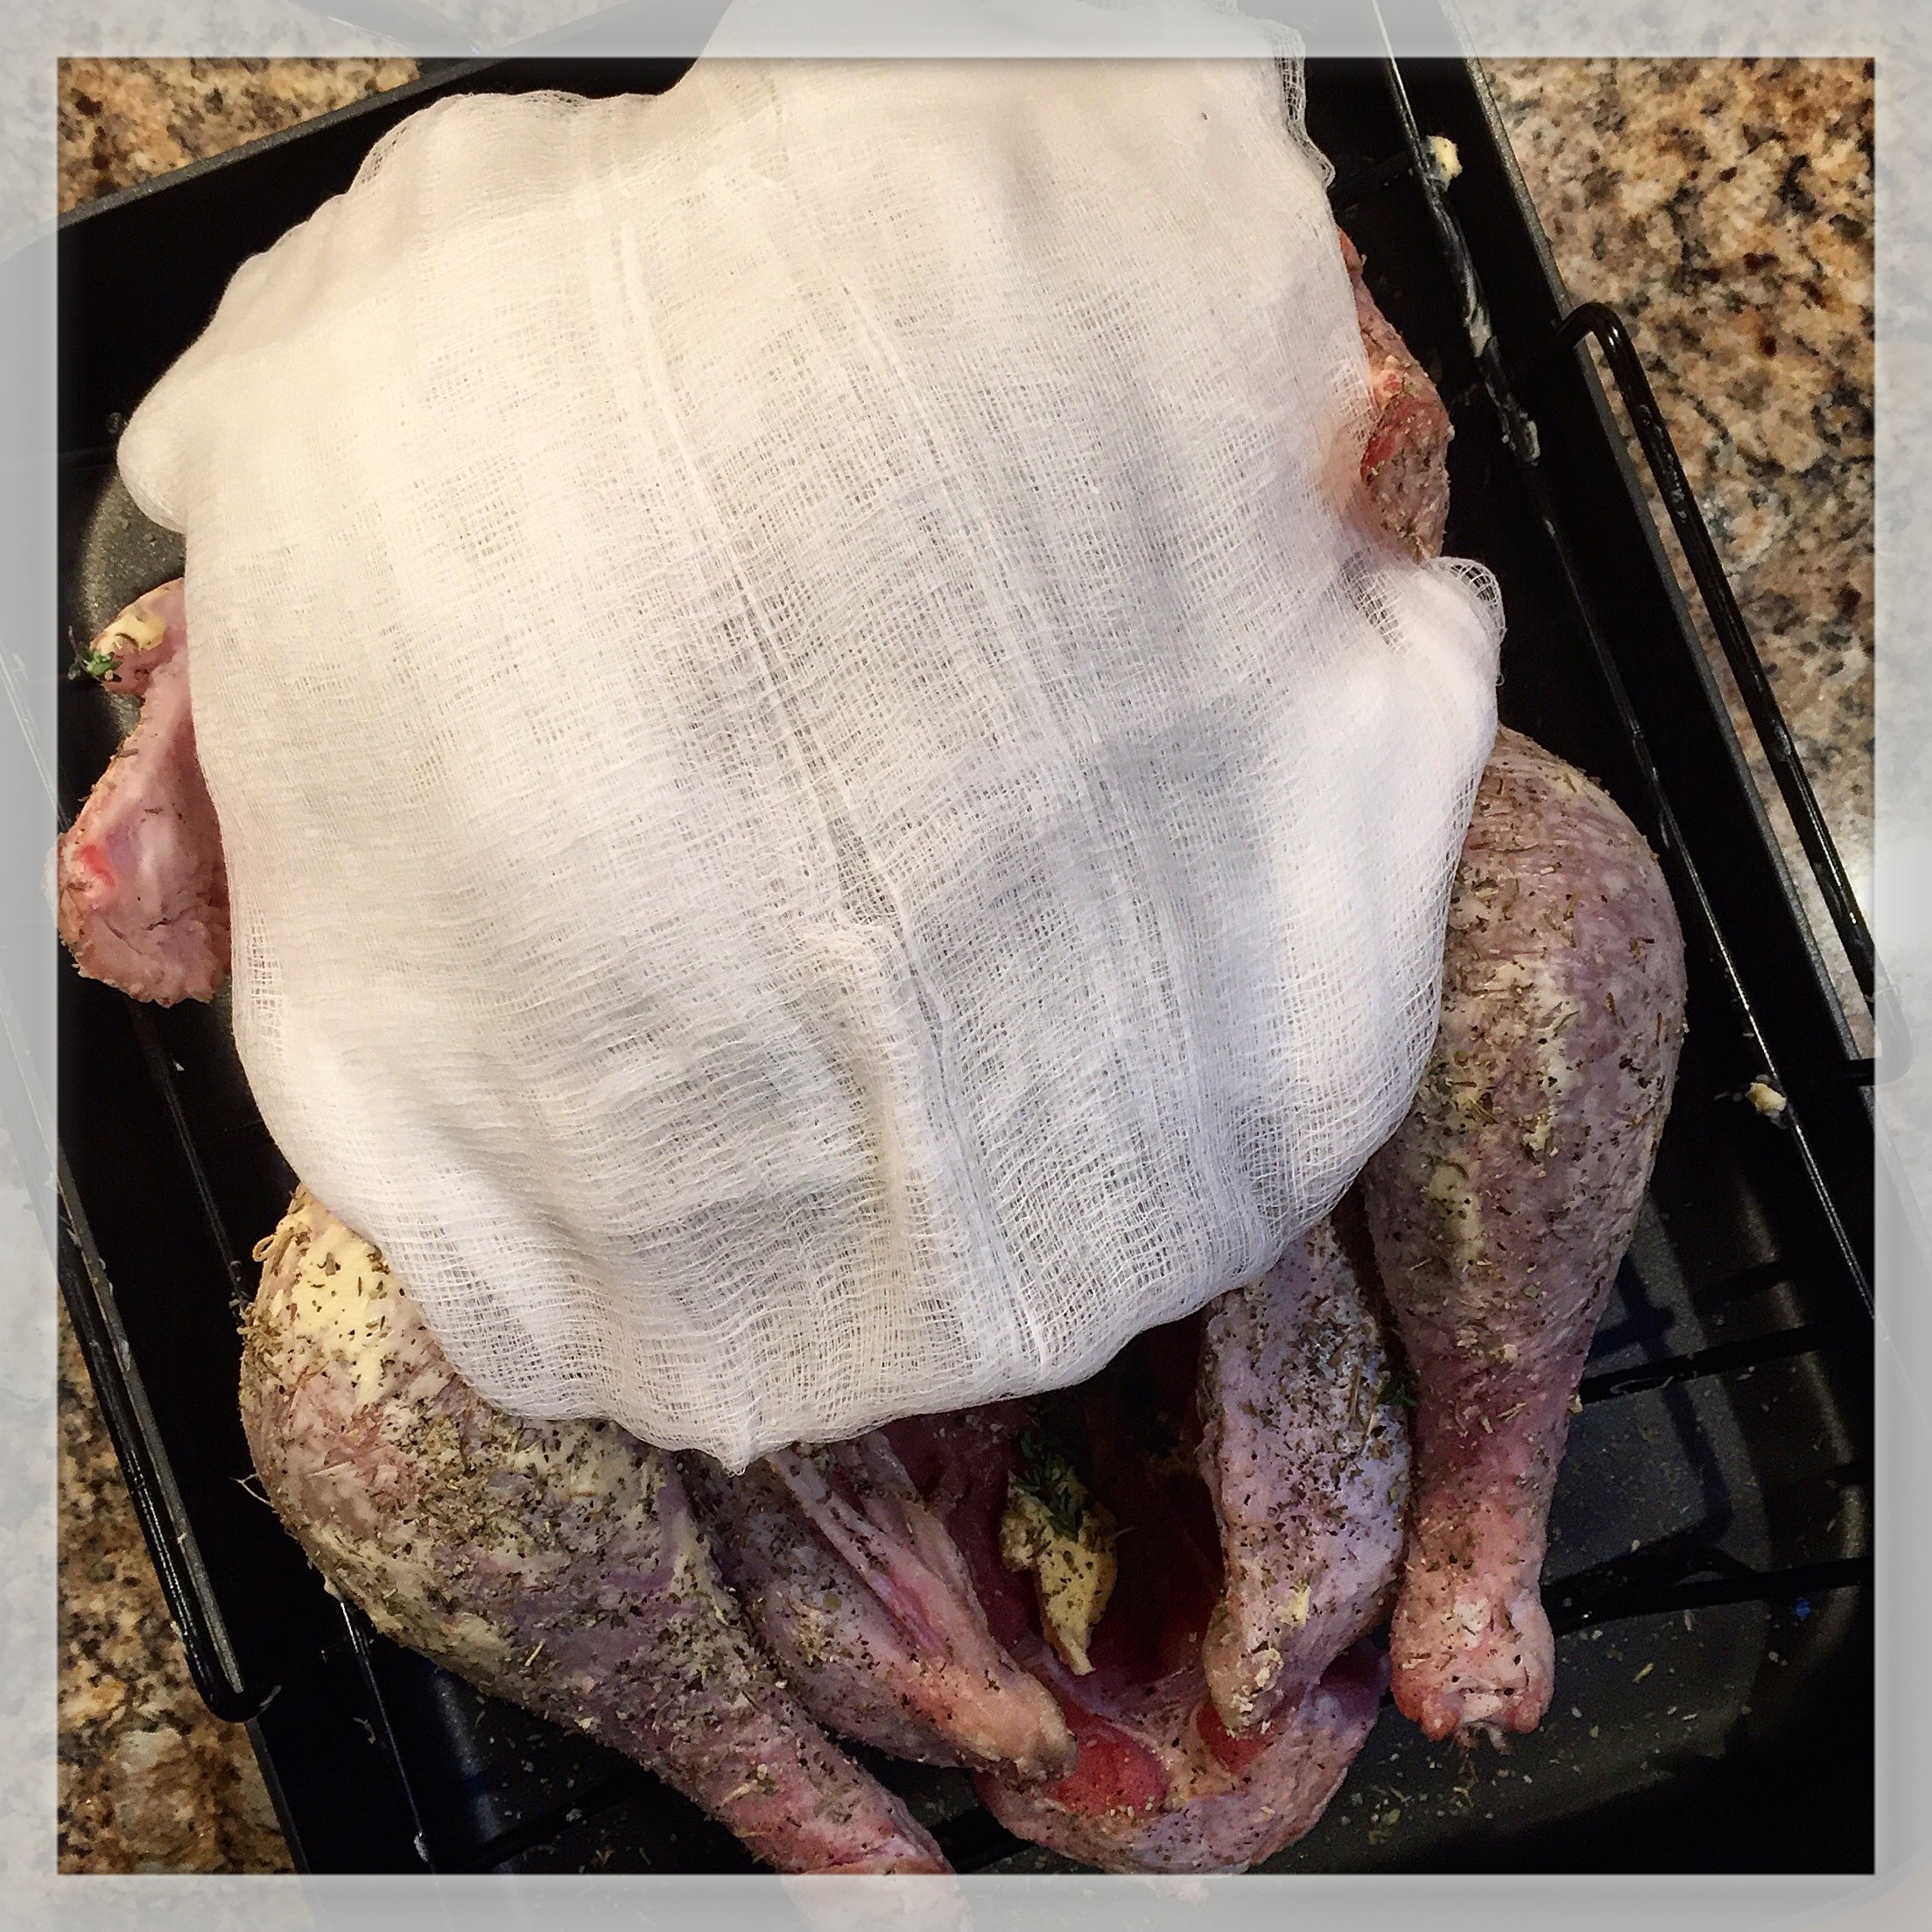
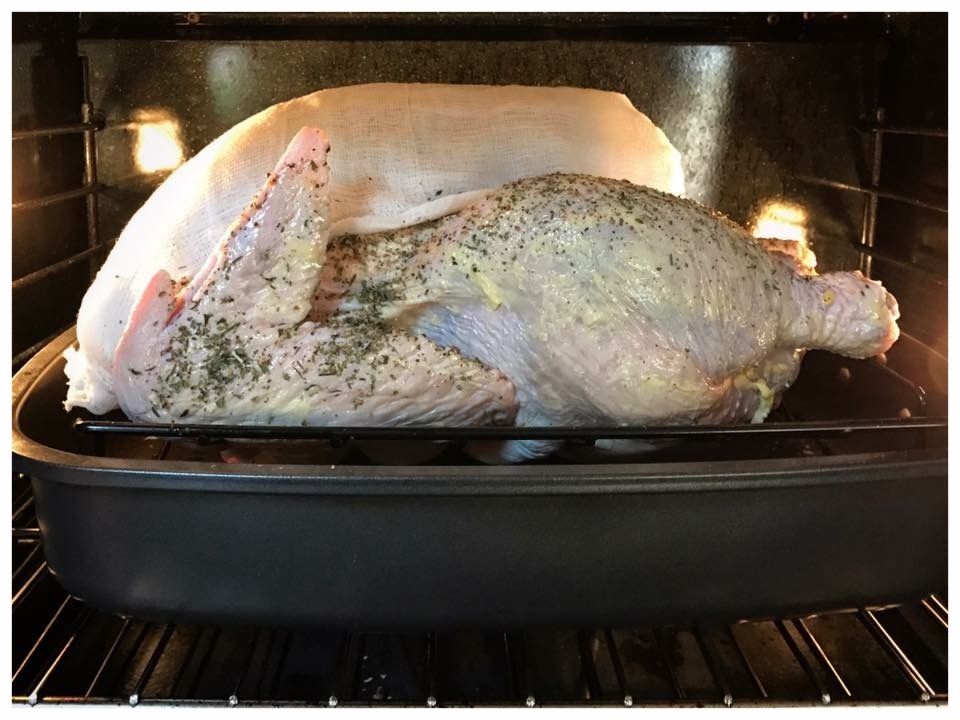
You see, after waking early (after doing even more dessert and dinner preparation the night before) I got started on prepping my turkey for cooking—cleaning, buttering, seasoning and covering my bird with cheesecloth (I always use a cheesecloth, it traps the moisture in the breast meat and you're able to baste right through it till ready). Next I set the table with plates, bowls, napkins, utensils and decorations. (some chocolate turkeys at each place setting was a nice touch)

Finally after beginning the roasting and basting of the bird I brought out everything else I had pre-prepared all week, which included a delicious "Roasted Butternut Squash Soup" and
"Ratatouille"

The house was so cozy, warm and smelling of all these incredible aromas; and as everyone began arriving I started serving up some starters while cooking, cooking and cooking some more..                       

It was such a great day, and I loved it so much having everyone over to enjoy the various dishes and desserts I had worked so hard on...

Everything tasted so good that I can't help but share at least a few of the recipes from that day with you, my followers (here and on Facebook & Instagram), which includes one of my new favorite side dishes as well as something wonderful to help you stretch out those incredible Thanksgiving leftovers we all enjoy so much...

The first dish is an oh so yummy "Pan-Seared Brussels Sprouts with Pancetta" followed by my "Personal Turkey Recipe" and finally the delectable dish that is an incredible alternative to the turkey sammies, which we all love, and which I'll be calling my "Thanksgiving Leftover Soup"

It's so good and so simple; and just the thought of sausage stuffing matzoh balls in soup with carrots, corn and turkey—Mmm, I can't even, I may have to make a turkey and stuffing just to make this soup again sooner rather than later...

In the end everything looked beautiful, felt wonderful and tasted great. So why not try some of these for you and your family next year or any time; because they are, oh so, "Definitely Delish"

"Pan-Seared Brussels Sprouts with Pancetta"

Ingredients:
1 pound fresh Brussels sprouts, trimmed and halved
2 tablespoons extra virgin olive oil
4 ounces thick cut pancetta, diced
2 garlic cloves, minced
Sea Salt and freshly ground black pepper
Dash of red pepper flakes
1/4 cup low-sodium chicken broth
Pinch of fresh Thyme and Sage, finely minced (1/4 teaspoon)

Directions:
1. Partially cook the Brussels sprouts in a large pot of boiling salted water, about 4 minutes... (Or you can lightly steam in the microwave until slightly cooked)
2. Meanwhile, heat the oil in a heavy large skillet over medium heat. Add the pancetta and sauté until beginning to crisp, about 3 minutes...
3. Add the garlic and sauté until pale golden, about 2 minutes. Then add the herbs and red pepper flakes, followed by the Brussels sprouts, to the same skillet and sauté until heated through and beginning to brown—about 5 minutes...
4. Season with sea salt and pepper, to taste. Then add the broth and cook until the broth reduces just enough to coat the Brussels sprouts, about 3 minutes...
Serve and enjoy...

“Herb-Roasted Turkey"

Ingredients:
1 fresh turkey (weight will affect cooking time)
Sea Salt & freshly ground Black Pepper, to taste
4 tbs. Turkey Herb blend (see below)
1 bay leaf
8 Tbs. (1 stick) unsalted butter, at room  temperature
1 cup turkey or chicken stock
1/2 cup Madeira wine
1 cheesecloth 

Directions:
1. Let the turkey stand at room temperature for 1 hour. 
2. Position a rack in the lower third of an oven and preheat to 325 degrees Fahrenheit..
3. Remove the giblets and neck, if included, and reserve for making gravy, if desired.
4. Rinse the turkey inside and out with cold water and pat dry with paper towels. Trim off and discard excess fat. Season the turkey inside and out with salt and pepper, and place 2 Tbs. of the herbs and the bay leaf inside the body cavity.
5. Spread 2 Tbs. of the butter over the turkey breast and evenly coat the outside of the turkey with the remaining 2 Tbs. herbs. 
6. Place the turkey on a rack in a large roasting pan. Fold a 3-foot square piece of cheesecloth into quarters, dampen with water and drape it over the breast, leaving the drumsticks exposed. Transfer to the oven. 
7. In a small saucepan over medium heat, melt the remaining 6 Tbs. butter with the stock and Madeira. After 30 minutes of roasting, begin basting the turkey with the butter mixture through the cheesecloth.
8. Continue roasting, basting every 20 minutes, for 1 1/2 hours more.
9. Then baste every 30 minutes with the butter mixture and the pan juices until an instant-read thermometer inserted into the thickest part of the breast, away from the bone, registers 165 degrees F—total cooking time will vary by weight...
10. Baste and gently remove cheesecloth and then baste Turkey again for a final 20 minutes in the oven to nicely brown the skin on breasts.
11. Transfer the turkey to a warmed platter, cover loosely with aluminum foil and let rest for about 20 minutes before carving.

"Turkey Herb Blend"

Ingredients:
1 tbs. dried sage
1 tbs. dried basil
1 tbs. dried marjoram
1 tbs. dried thyme
1 tsp. parsley flakes
Pinch of dried mint

Directions:
1. Mix together evenly (double, triple or quadruple the amounts and save excess in a tin for future use)

"Thanksgiving Leftover Soup"

Ingredients:
1 large Vidalia onion, chopped
2 peeled Carrots, sliced
2 stalks Celery, sliced
2 Garlic cloves, chopped
1 tablespoon extra-virgin olive oil
2 large eggs
6 tablespoons all-purpose flour, plus more as needed
1/2 teaspoon Sea Salt, plus more as needed
Freshly ground black pepper, to taste
2 cups leftover stuffing
2 sprigs fresh thyme
2 cups shredded leftover turkey meat, torn or shredded
1 cup leftover corn kernels
4-6 cups of low sodium Chicken Broth

Directions:
1. In a small bowl; whisk the eggs, flour, 1/2 teaspoon salt, and some black pepper together until smooth...
2. Add the stuffing and mix until well combined—cover and reserve in the refrigerator until needed...
3. Heat the oil in the pot over medium heat. Add the chopped onion and garlic and cook until soft and translucent, about 6 minutes...
4. Add the sliced carrots and celery, thyme sprigs, and broth and bring to a boil and then reduce heat to a simmer...
5. Cook the vegetables until just soft, about 10 minutes...
6. Roll level tablespoons of the dumpling mixture into balls with wet hands (see note) and drop into the simmering soup; cook until dumplings float, approximately 4 to 5 minutes...
7. Gently stir in the turkey meat, corn, and season with salt and pepper (to taste), and simmer until heated through. Serve immediately and enjoy..

Note: Moistness of stuffing can vary; if the dumpling dough is too soft to roll, add flour a teaspoon at a time until it is firm enough to hold its shape while rolling...
 

"Vegetable Frittata" With "Pancetta & Cheese"

The wonders of buttered eggs. I had never thought or heard of buttered eggs until reading one I discovered, what the French have never forgotten, the joys of hot buttered eggs..

As John Masefield writes- “Time, Tide and buttered eggs wait for no man…


So taking this new found knowledge, on how to create the silkiest eggs you’ve ever tasted, I applied it to the creation of the most wonderful custard'y textured frittata I had ever had.

If you’ve never tried a frittata before, they are this incredibly versatile dish that is more than an omelet but less than a quiche. It’ll taste as good cold or room temperature as it does fresh from the oven; and luckily, it is also a dish you can prepare ahead of time. Thus making it a perfect accompaniment to any Holiday brunch..


“Vegetable Frittata with Pancetta and Cheese”

Ingredients: 
6 ounces diced Pancetta (you can use boars head brand diced pancetta available at Pat’s market as well as Stop and Shop’s in your neighborhood-optionally you can use 4 slices chopped cooked bacon)
1 small Vidalia onion, sliced
Several baby Bell mushrooms, sliced
7-8 Eggs, at room temperature
3 tablespoons Cream
2-3 tablespoons Butter, just barely melted
2 teaspoons Olive Oil, plus additional butter for sautéing vegetables
6-8 Fingerling potatoes, sliced (I used a mix of gold and purple potatoes)
Asparagus, woody ends removed and cut into 2-3 inch long pieces
Grape tomatoes, a handful sliced in half (I used mini Marzano tomatoes available at Pat’s marketplace)
2-3 tablespoons Bel Gioioso Asiago, thinly shaved (though regular Asiago is also fine to use)
1-2 tablespoons Locatelli Romano (regular Romano cheese is also fine to use)
Fresh chopped Italian parsley
Sea Salt and fresh cracked black pepper to taste
Dash of Cayenne pepper

Directions:
1. Pre-heat oven to 350 degrees, wrap the outside of a tart pan (if it is one with a removable base) tightly in foil and spray inside with cooking spray..
2. In a separate skillet, cook diced pancetta until it begins to crisp and place on paper towels to drain..
3.
In same skillet heat the olive oil over medium high heat and cook the onions and mushrooms until they begin to brown, 10-20 minutes. (Add a teaspoon of butter if necessary)
4. Meanwhile slice and chop all other vegetables as needed, then crack eggs into a bowl and continue to let them reach room temperature. (cold eggs take longer to cook and will cause the melted butter to solidify)

5. Remove Onion and Mushroom from skillet and set aside, then add a touch of butter to pan and cook thin sliced potatoes for 5-10 minutes until lightly browned. Remove and set aside, then finish by cooking the Asparagus in the same skillet for 5 minutes, till crisp tender..
6. Add half or more of the various vegetables (tomatoes, potatoes, etc.) and pancetta to the tart pan, then sprinkle with 2-3 tablespoons of the cheeses..
7. Now prepare the eggs by just barely melting the room temperature butter and adding it to the eggs along with 2-3 tablespoons of cream, salt, pepper and cayenne. Whisk gently, but be careful not to overbeat the eggs-then pour into your tart pan..
8. Finish by adding more of your cooked ingredients, as well as a few sliced tomatoes and a last sprinkling of cheese-then place into the oven to bake for 20-25 minutes (or until just set, but be careful not to overcook). Let the frittata cool for a few minutes before unwrapping foil and removing it from the pan..

Garnish with fresh chopped parsley and enjoy..

"Roasted Butternut Squash & Sweet Potatoes" With "Kielbasa & Apples"

Fall means busier schedules, so fast family-friendly weeknight meals like this simple Roasted Squash, Sausage and Apple One-Pan Dinner are so helpful to have on hand..


A mix of healthy ingredients and low calorie alternatives create a dish with an exceptionally sweet, and tasty, treat for dinner that even the young ones in your house will enjoy it..

So if you’re ready for fall colors and flavors, then throw a pan of this pumpkin spiced meal that will be sure to hit the spot..


Trust me, you won’t be disappointed..


“Roasted Butternut Squash With Apples And Turkey Kielbasa One-Pan Dinner”

Ingredients:
1 tablespoon, divided in half, apple cider vinegar
1 tablespoon pure maple syrup
2 teaspoons Dijon mustard
1 small butternut squash, peeled, seeded and cut into 1 ½-inch chunks (about 1 to 1/2 pound)
2 to 3 small sweet potatoes, peeled and cut into chunks
1/4 cup, or less, light butter (I use Kerrygold or Smart balance light with omega 3)
2 tablespoonfuls of “Truvia Brown Sugar Blend” (Splenda makes a lower sugar, brown sugar blend also)
1/2 teaspoon smoked or sweet paprika
1/2 teaspoon sea salt
1/4 teaspoon ground nutmeg
1/4 teaspoon cinnamon
1/8 teaspoon ground cloves
1/8 teaspoon ground allspice
Freshly ground pepper, to taste
3 small apples (or 2 large) cored and cut into 1 ½-inch chunks (I mix green and red)
1 pre-cooked Turkey Kielbasa, sliced (I use Hillshire Farms or Johnsonville)

Directions:
1.
Preheat oven to 425 degrees F, positioning the rack at above the mid level of the oven. Shake 2 teaspoons apple cider vinegar, maple syrup and mustard in a small jar..
2. Meanwhile, toss squash, sweet potatoes, melted light butter (or substitute), Truvia brown sugar blend, paprika, sea salt, 2 teaspoons of apple cider vinegar, spices (cinnamon etc) and pepper in a large bowl to coat. Spread out on a large rimmed baking sheet..
3. Transfer squash to the oven and roast 10 minutes. Add apples & sliced sausage into the large bowl with melted butter and spices then toss to coat with the remaining liquid..
4. After 10 minutes remove baking sheet from oven and add the apple, sausage and any remaining liquid to the sheet. Return to the oven and roast, until the apples are softened and the squash is tender, about 18 to 22 minutes longer. Remove from the oven..
5. Drizzle the vinegar-maple-mustard mixture over the roasted mixture in the pan and toss to coat. Serve immediately..

Notes:
1. You can add other vegetables or squash types if desired. I will often add chopped carrots with the squash in step 2.
2. Some might prefer more or less of the spices, your personal preference, add more or less if desired or leave out if you don’t like a specific spice (say cloves or another)
3. Seen similar dishes which add a couple of handfuls of kale to their dishes—if you’re a Kale fanatic who loves adding the greens to a dish, then I would suggest adding it during step 4 with the apple & kielbasa..

"Linguine and Clam Sauce" with "Sun-Dried Tomatoes and Pepperoni"


It's been a very busy couple of months here at "Definitely Delish"

Not only has it been fourteen hour work days at my regular job, the travel company business, seeing my beautiful goddaughter as much as possible and birthdays..

I've also been working in the little off time I have on creating a surprise for my sweetheart at home—an outdoor spa oasis with hot tub, hanging lights, lanterns and statues..

This took quite a bit of my little free time I had left, but the finished results looks great and I'm happy with it..


That's not to say I haven't on occasion been cooking but it's mostly just been dishes I've done a whole lot of times before or have already blogged about, so it wouldn't do to repeat..

Now I've decided to get to you a new, long overdue recipe—an that is this delish dish..

A yummy, flavorful helping of "Linguine in White Clam Sauce" but with a kick—a extra dose of taste has been added with the addition of pepperoni and sun-dried tomatoes to the mix..

So sit back, enjoy and try it for yourself—because I think you'll find it is oh so "Definitely Delish"


"Kicked Up Linguine" with "White Clam Sauce" 

Ingredients:
1 pound linguine (I used GK-Skinny Pasta)
1/2 cup Olive Oil plus 1 tablespoon
1 tablespoon Butter
6 cloves Garlic, finely chopped
3/4 cup dry White Wine
2-3 tablespoons dry Sherry
18 Littleneck or Chowder Clams
1/4 cup Clam Juice
1/4 cup of Chicken Bone Broth
Sea Salt and freshly ground Black Pepper
1 tablespoon fresh Thyme
1/4 to 1/2 a cup Sun-dried Tomatoes in Oil (depending on personal taste)
1 small Zuchinni, matchstick cut with mandolin (or use big side of cheese grater for larger matchstick pieces)
2 ounces (or less) of sliced Pepperoni, cut into quarter wedges
1 tablespoon chopped fresh Italian, flat leafed Parsley (plus extra for garnish)

Directions:
1. Bring a large pot of salted water to a boil and cook the pasta, following the package instructions, until al dente..
2. Meanwhile, warm 1/2 cup of the olive oil, and tablespoon of butter, in a high-sided saucepan (big enough for your clams to rest in a single layer) set over  medium-high heat..
3. Add the garlic and cook until softened, about 2 minutes, until golden (Be careful not to burn)
4. Add the wine and sherry allowing it to cook away slightly, about 1 minute.. 
5. Add the clams, clam juice and chicken bone broth—an then season with sea salt and black pepper.. 

6. Add fresh thyme leaves and half the parsley—then cover pot and cook until the clams open. About 5 minutes..
7. Add drained sun-dried tomatoes (more or less depending on personal taste), pepperoni and zuchinni. Reduce heat to medium and stir to combine..
8. Remove from the heat and stir in the remaining parsley..
9. Drain the pasta (reserving a 1/2 cup of cooking liquid) and toss in a serving bowl with the remaining 1 tablespoon olive oil—adding reserved cooking liquid if needed..
10. Distribute the pasta evenly among six pasta bowls. Top each with equal portions of the sauce, and serve immediately garnished with parsley..

Notes:
1.
You can also toss the sauce with the pasta before distributing it to your pasta bowls..
2. Goes well with a nice light white wine, a Sauvignon Blanc or Chateu St. Michelle Reisling is nice..
3. Serve with Sesame Semolina Italian bread with butter..
4. You can also remove some of the clams from their shells, lightly chopping them and tossing with the sauce before serving..

"Cajun-Creole Jambalaya"

It's been a long break from cooking or blogging recently..

I've been away these past few weeks on a much needed vacation to New Orleans and the Mexican Riviera..

New Orleans is one of my most favorite places in all the world to be..

I love the history, the atmosphere, the sights and sounds of this Southern U.S. city—and don't even get me started on their cuisine..

I could go on forever and a day about the food—from the coffee & chicory with beignets, the étouffée's and gumbos, the seafood and the down home southern food..

There's a never ending supply of variety and an endless parade of new food experiences to explore inside Nawlin's.. 

It's because of this wonderful mix of French, Spanish, American, African, Island and Native influences thrown together with all of the new culinary discoveries and imports from around the world that makes it such a special "Foodie" city..

Now though, after thoroughly devouring the streets and food scene in the Big Easy, I'm back home..

An though sadly my journey to New Orleans is over, it didn't take long before I felt the need to do a little culinary invention of my own and get back into my favorite room in the house—the kitchen..

An what better dish to make on my return from NOLA, then my own version of a Cajun-Creole standard—"Jambalaya"

Using a mix of chicken, andouille sausage and slow cooked beef stew meat with my peppers, tomatoes, onions, herbs & spices to create this "just spicy enough" version of a tasty jambalaya was the result..

Came out perfectly and such a nice addition with the beef—was practically ready to fall apart as soon as you put it in your mouth. An the heat, just perfect—spicy enough to enjoy but not so hot as to wake the dead down in Louisiana..

Just be sure leave a bottle of hot sauce on the table for those in your home that will only settle for a "Four Alarm Fire" in their mouth and nothing else..

"Definitely Delish" an definitely a dish that you, and your family, will absolutely enjoy—trust me...


"Cajun-Creole Jambalaya"

Ingredients:
For Jambalaya:
1 tablespoon extra-virgin Olive Oil
1 tablespoon Butter
1 1/2 pounds boneless, skinless white meat Chicken cut into pieces
3/4 pound andouille, sliced or diced (pre-cooked is easier to slice)
1 medium Sweet Vidalia Onion, chopped
2 ribs Celery, chopped
2 Bell Peppers, chopped (I used a mix of yellow, orange and green for color)
1 Bay Leaf, fresh or dried
1/8 teaspoon hungarian Paprika
2 to 3 tablespoons (a handful) all-purpose Flour (plus more for coating chicken and beef)
1 (14-ounce) can diced Fire Roasted Tomatoes in juice
1 (14 ounce) can crushed San Marzano Tomotoes
2 cups low sodium Chicken Stock or Chicken Bone Broth
1 teaspoon (1/3 palmful) Cumin
1/4 to 1/2 a teaspoon Chili Powder
1 teaspoon (1/3 palmful) Poultry Seasoning
1 teaspoon Worcestershire sauce
Coarse Sea salt and Black Pepper
Chopped Scallions(green onions), for garnish
Chopped Chives, for garnish
Chopped fresh Italian Parsley, for garnish
Fresh Thyme, chopped for garnish

For Beef:
1 pound Beef Sirloin, cut into a mix of 1 or 2 inch cubes
2 cups of Beef Broth
1/4 Red Wine
pinch of dried Thyme and Sage
enough Water to cover meat
1 tablespoon Butter & Olive Oil
2/3 cup Flour, 1 tsp. Sea Salt and Black Pepper for coating

For Risotto:
2 cups of Risotto rice
2 cups of Chicken Bone Broth or Stock
2 cups of Water
1 teaspoon of Sea Salt
1 tablespoon of Butter

Directions:
For Beef:
1. Mix 2/3 of a cup of flour (or gluten free alternative) with a teaspoon of sea salt and black pepper. Then slice your beef sirloin into cubes of about 1 or 2 inches in size. Toss together to coat all sides of your beef with the flour mixture..
2. Add beef broth, red wine and herbs to a small pot with butter and bring to a low boil on medium heat..
3. In your main chef's pot or saute pan with deep sides, heat a tablespoon of butter and olive oil on medium high heat--then add your beef, in batches if necessary, searing/browning all sides of your beef stew meat..
4. Remove from the beef from the pan and transfer to the simmering broth and add water, if needed, to cover completely. Bring the small pot to a boil, cover and reduce temperature to simmer. Cook for 1 1/2 to 2 hours or till almost ready to shred, then remove from heat--be sure not to over cook as we want it to retain it's shape and not have the beef falling apart..

For Risotto Rice:
1. Add two cups of risotto, 1 tablespoon of butter, 2 cups of chicken bone broth, 2 cups of water and sea salt..
2. Bring to a boil, stir and then cover. Reduce the heat to a simmer and cook on a low boil/simmer for 20 to 25 minutes, or until the rice is done and the liquid is absorbed. Remove from heat and leave covered till needed..

For Jambalaya:
1. Slice and chop your andouille sausage, chicken (small 1 to 2 inch pieces), vegetables, onions and garnish in preparation. Take several tablespoons of flour, or leftover from the beef, and toss your sliced chicken in it to coat..
2. Heat a tablespoon of butter and olive oil on medium high heat in your deep sided saute or chef's pan. Add chicken in a layer and let sit for 2 minutes before flipping to sear, cook for an additional minute to brown slightly before adding the slice sausage and cooking for 2 more minutes..
3. Add the chopped onion, celery,bell pepper, bay leaf and paprika (can sub cayenne for a spicier flavor). Saute the vegetables with meat, stirring the pan occasionally, for 5 minutes. Sprinkle 2 to 3 tablespoons of flour over the pan and cook for 1 to 2 more minutes, stirring..
4. Stir in your tomatoes and chicken bone broth(stock), then season with cumin, chili, poultry seasoning and worcestershire sauce. Bring everything to a low boil, adjusting heat if necessary..
5. Strain liquids out of the small pot of beef, then transfer beef to the main saute pan and stir to mix. Cover loosely and reduce heat to a simmer, cooking for 10 to 15 minutes..
6. Ladle servings into your serving bowls and using a small ice cream scoop, place a scoop or two of rice onto the center of the bowlfuls of jambalaya. Sprinkle with coarse sea salt, black pepper, chopped scallions, chives, minced parsley and thyme to garnish..

Notes:
1. For thicker jambalaya you can add additional flour or "Wondra" to the pan as a thickening agent near to the end of cooking..
2. I enjoy the low sodium Chicken Bone Broth for the extra nutrients, but Chicken Broth or Stock is fine as a replacement..
3. For a spicier version use a whole teaspoon of chili powder with 1/8th of a teaspoon of cayenne instead of the paprika and smaller amount of chili powder..
4. I like the sticky, creamy texture of the risotto but you can sub in plain enriched white rice. You want it to be sticky for the effect of scooping it on top, but it's not a deal breaker if it's not..
 

"Gluten-Free Copycat Nabisco Chocolate Snaps"

Every once in a while, I'll have this—I don't know, this deep seeded sense of nostalgia..


It doesn't happen too much, I'm not that old yet, but when it does I can get to reminiscing about the things of my youth—when things seemed fresh, new and so much simpler by far..

Often it'll be food that gets me to dreaming about days gone by—when TV Dinners were in aluminum trays you heated in the oven, Ring Dings came in foil wrappers and Nabisco made their Snap cookies..

It was this last one that hit me recently. First, I wistfully thought of the cute little box with the tiger on the cookie and then it was trying to remember that taste—there was really no other cookie like it and I can remember eating them for years growing up..

Sadly, like so many things from my childhood, these had disappeared long ago from store shelves..

Being somewhat handy in the kitchen and after imagining the wonderful simple plain chocolate cookie taste with just the tiniest bit of snap to it—I decided I could wait no longer, so I set about attempting to discover again that sweet memory of flavor..


As I gathered myself to bake, and after tweaking a few ideas to fit my thought of what it would take to create this long gone snack, I decided that since I have been on such a Gluten-Free cooking kick lately—well, I would just try and continue with this recipe..


I'm not exactly sure why, I don't have Celiacs or a gluten intolerance, but I know some who do—so I guess I've been wanting to see what I can make for them that isn't out there like it should be..

A few ingredients, just a little bit of work and before you know it they started flying out of the oven needing a quick squish—then set aside to cool till done..

They were perfect..

Just like I remember..

Thin, chocolatey and with just a little snappy bite to them..

So if you, like me, remember that tiny rectangular box with the tiger face drawn on the cookie from the 70's and 80's then you will fall in love with these simple, plain, wafer'ish cookies—because without a doubt they are "Definitely Delish"


"Gluten-Free Copycat Nabisco Chocolate Snaps"

Ingredients:
1 1/2 cups shortening
1 1/2 cups Light Brown Sugar
1 cup White Sugar
2 Eggs
1/2 cup Cocoa
1/4 cup Special Dark Cocoa
1/3 cup Milk
3 tsp. Vanilla
2 tsp. Baking Powder
2 tsp. fine Pink Himalayan Salt
1/4 tsp. Cinnamon
1/4 tsp. Baking Soda
4 cups Gluten Free Baking Flour (I use King Arthur Brand)

Directions:
1. Preheat oven to 375 degrees.
2. Cream 1 1/2 cup shortening, 1 1/2 cup light brown sugar and 1 cup white sugar. Add 2 eggs and beat..
3. Add 3/4 cup cocoa, 1/3 cup milk and 3 tsp. vanilla and beat.
4. Add remaining ingredients of 2 tsp. baking powder, 2 teaspoons of Himalayan salt, cinnamon, 1/4 tsp. soda and 4 cups of gluten free baking flour..
5. Form in balls size of walnut and place about 2 inches apart on a cookie sheet..
6. Bake 12 minutes. Smash flat when they come out of the oven while still warm. 
7. Repeat until all dough is used up. Makes about 100 cookies, or more, depending on how big you make them..
 

"Scrumptious Sides For Your Fall & Winter Holiday Table"

Summer's over and all the children are back in school; so you know what that means, that's right, the Holiday season is upon us. For the next several months the parties and dinners will almost be non-stop and though the big granddaddy of them all may be "Thanksgiving" in November, there will be more than enough other events both big and small to occupy our days in the meantime. So to help with that all important decision this year about what to bring, or serve, as a vegetable for family and friends at your next gathering. Let me suggest two that will serve you well…


A quick and simple side, full of the incredible flavor of Italian bacon and perfect to either make for your own, or bring to a, Thanksgiving Day celebration with family or friends…

"Pan-Seared Brussels Sprouts with Pancetta"

Ingredients:
1 pound fresh Brussels sprouts, trimmed and halved
2 tablespoons extra virgin olive oil
4 ounces thick cut pancetta, diced
2 garlic cloves, minced
Sea Salt and freshly ground black pepper
Dash of red pepper flakes
1/4 cup low-sodium chicken broth
Pinch of fresh Thyme and Sage, finely minced (1/4 teaspoon)

Directions:
1. Begin by partially cooking the Brussel sprouts in a large pot of boiling salted water, about 4 minutes. (Or you can lightly steam in the microwave until slightly cooked
2. Meanwhile, heat the oil in a heavy large skillet over medium heat. Add the pancetta and sauté until beginning to crisp, about 3 minutes. Add the garlic and sauté until pale golden, about 2 minutes...
3. Then add the herbs and red pepper flakes, followed by the Brussels sprouts, to the same skillet and sauté until heated through and beginning to brown—about 5 minutes...
4. Season with sea salt and pepper, to taste. Then add the broth and cook until the broth reduces just enough to coat the Brussels sprouts, about 3 minutes...
Serve and enjoy...


This is the most delicious cauliflower recipe you’ll eat and on top of that it’s such an easy addition to include a roasted cauliflower in your family’s dinner plan or for a dinner party with friends. I have also been told you can do it in an instant pot, and then brown in the oven for a few minutes.

"Whole Roasted Cauliflower"

Ingredients:
1 whole head of Cauliflower
½ cup of Greek Olive oil (premium EVOO available at The Crushed Olive, Babylon)
Clarified Butter or Ghee (available at North Shore Farms, or substitute butter)
Fresh Italian Parsley, chopped
Cast Iron Skillet (or any oven safe pan)
1 teaspoon Pink Himalayan or Sea Salt, or more to taste
1/4 teaspoon Fresh Ground White Pepper, or more to taste
Aluminum/Tin Foil

Directions:
1. First, go and preheat your oven to 375º Fahrenheit. Then trim the bottom of the cauliflower and remove all the leaves and the hard stem – but without breaking apart the cauliflower...
2. Go ahead and give it a quick rinse, patting it to dry. Generously drizzle your extra virgin olive oil on top. It’s the key to a perfectly roasted cauliflower head. Then add salt and pepper...
3. Using your hands spread the oil and salt all around the cauliflower.  Place it in an oven-safe pan and cover tightly it with foil. I use a cast iron skillet, but if you don’t have one, anything that you use in the oven will work...
4. Cook in the oven for 30 minutes, depending on the size of your cauliflower...
5. Now, remove foil and allow it to roast for an additional 60 minutes so it turns golden brown. Keep an eye on it, so it doesn’t burn...
6. After it’s finished; melt 3 Tbsps. of Ghee (clarified butter, available at North Shore Farms) and mix in the chopped parsley, then drizzle or brush it on the cauliflower while it’s still hot...
7. Once it’s sliced, it may need extra salt-season to taste…

"Brussels Sprouts with Pancetta"

"Roasted Cauliflower"

"Pan Roasted Brussels Sprouts"

"Holiday dinner is perfect for these sides"

"Thanksgiving Dinner Or Anytime - You Can't Go Wrong With These Veggie Dishes"

"Spiced French Toast Bake"

"Spiced French Toast Bake"

I find that creating breakfast recipes can be some of the toughest to do...

I mean there's only so many ways to scramble an egg or make an omelette, waffle or French toast...

An though I've still attempted it by tweaking an "Eggs Benedict" using "English" crumpets and "Kobe-Wagyu" sirloin burgers or by layering a "Frittata" with potatoes, pancetta, mushrooms, asparagus and cheese—I still find it tough to find a technique or addition to make a breakfast recipe truly my own...

"Farm Fresh, Organic & Homemade"

"Farm Fresh, Organic & Homemade"

This is one of those...

Taking a personal love of all things bread related; I took buttered toast for breakfast, along with my French Toast recipe and decided to combine the two together with a twist...

Taking cues from a "New Orleans" style Bread Pudding (which has been much on my mind as me and my Baby plan our return trip); I played around with the ingredients and after a night at rest, me and my Baby were blessed to have this beautiful symphony of sweet and spicy ingredients slowly baking in the oven...

"Sweet, Spicy & Buttery"

Once done, and dusted with powdered sugar, it was ready to be served up with some pure organic maple syrup...

Such a serendipitously satisfying selection to soothe both your hunger and your sweet tooth at the same time...

So try out my "Spiced French Toast Bake" yourself; I think you'll find that it is,
oh so "Definitely Delish

"Sweet & Spicy Sliced French Toast" 

"Spiced French Toast Bake"

Ingredients:
1 loaf of fresh made Whole Wheat Bread, cut into 14 slices
3 tablespoons unsalted Irish Butter, softened
6 tablespoons granulated organic Sugar
Zest of 1/2 lemon
2 teaspoons Vanilla extract
6 farm fresh Eggs
2 cups Whole Milk
1 cup Light Cream
1 tablespoon Amber Rum
1/2 teaspoon ground Cinnamon
1/8 teaspoon of ground Cloves, Allspice & Nutmeg
1/4 teaspoon Pink Himalayan Salt or Sea Salt
Powdered sugar, for dusting
Organic Maple syrup to finish (optional)

Directions:
1. Pre-heat oven to 350 degrees Fahrenheit. Slice your bread into 14 slices and then diagonally into triangles. Arrange them on a large baking tray and bake for 5 to 10 minutes, until firm to the touch but not yet browned. You can flip halfway through baking...
2. Lightly butter a 9×13-inch or other 3-quart casserole dish with 1 tablespoon of softened butter. Melt the remaining butter in a dish and using a silicone basting brush, brush each slice of bread after they're done in the oven...
3. Fan your bread slices out into the pan. Now place sugar and lemon zest in the bottom of a small dish and use your fingertips to rub the zest into the sugar, so it breaks up a bit and also releases the most flavor. Sprinkle half of lemon sugar over bread inside your casserole dish...
4. Whisk eggs in a large bowl; then slowly whisk in the cream and milk, followed by the ground spices...
5. Stir in vanilla, rum and salt. Pour custard slowly and evenly over bread and sugar, then sprinkle with the remaining lemon sugar... 
6. Let mixture soak covered overnight in the fridge. If pressed for time you can let it sit for 30 minutes on the counter instead before baking, but overnight is better...

"French Toast Bread Pudding"

7. When ready, heat oven to 365 degrees. Loosely cover the "French Toast Bake" with foil and bake for 15 minutes on the middle (or just below middle) rack of the oven. Remove foil and bake for approximately 30 minutes more, until a knife inserted into the center of the casserole and turned slightly causes no liquid custard to spill into the crack. (This can vary by the density of your bread; it can sometimes take longer to finish. Check regularly till done every couple of minutes)
8. Let cool slightly before serving. Dust with powdered sugar and serve with maple syrup on the side, if desired...

"Spiced French Toast"

"Sweet, Spicy & Delicious"

"Buttered Toast, French Toast And Bread Pudding Together At Last"

"Perfect on a Sunday Morning"

"Oia, Santorini - Somber Shades by R.Fisher"

"The Monte Cristo-A Sandwich Classic"

"Monte Cristo"

Recently I've found myself greatly desiring sandwiches for dinner; I don't know what it is, perhaps I've just had an overwhelming hankering for bread—which I don't nearly eat as often as I used too...

Regardless of the reasoning behind my latest creation; you, my dear friends, get to enjoy the fruits of both my desires and labors—which this time have brought forth that delectable mix of sweet and savory ingredients, the "Monte Cristo"

"Porto'fino by Night"

Thought to have it's origins in a Paris cafés offering of a "Croque Monsieur"—which was gruyere cheese and lean ham between slices of crust-less bread, fried in clarified butter.

This sandwich is still a popular snack or casual meal throughout France and Switzerland in most bars and cafés. It is usually made in a special sandwich grilling iron consisting of two hinged metal plates, each with two shell-shaped indentations...

"Classic Monte Cristo"

At some point though in America, in the 30's and 40's, the sandwich began to pop up in cookbooks across the country as a "French Toasted Cheese" sandwich or "Toasted Ham" sandwich—shortly followed by it's appearances all across southern California and finally Disneyland in the 60's...

During this deliciously desirable sandwiches travels from the quaint riverside cafés of Paris to the restaurants of Disney and beyond it finally achieved the form we are all familiar with today...

"NOLA on my Mind"

So, for this "Monte Cristo" I took my tried and true traditional French Toast recipe, aged gruyere cheese, fresh roasted turkey, honey baked ham and a variety of accompaniments to create this wonderfully scrumptious and incredibly satisfying merging of the very best of both sweet and savory ingredients—I think if you try it you'll find that it is, most assuredly, oh so "Definitely Delish"

"Sweet & Savory Monte Cristo"


"Classic Monte Cristo Sandwich"

Ingredients:
8 slices firm bread, sliced 1 inch thick (I use Challah bread)
6 large Eggs
2 tablespoons Heavy Cream
3 tablespoons light brown sugar
1/2 teaspoon ground Cinnamon
1/4 teaspoon ground Cloves
6 tablespoons unsalted Sweet Cream Butter
2 teaspoon Vanilla extract
1/4 teaspoon Sea Salt
2 tablespoons Dijon or Deli Mustard
2 tablespoons Mayonnaise
12 ounces Baked Ham, sliced
8 ounces roasted Turkey, sliced
8 ounces Aged Gruyère cheese, shaved
Powdered Sugar for dusting

"Delish Monte Cristo Sandwich"

Directions:
1. Slice your bread into 8 pieces and then put them on the top rack of your oven at 225 degrees Fahrenheit for about 10 minutes to dry them out—you want to avoid toasting the bread beyond a light golden color...
2. Whisk together the heavy cream, eggs, brown sugar, vanilla extract, cinnamon, cloves and sea salt in a medium bowl. Pour the mix into a 9x13-inch baking pan for easy dipping...
3. Allow the butter to soften at room temperature then preheat a large skillet or grill plate at medium temperature...
4. Take 2 slices at a time and place them into the egg mixture for 20 seconds, then flip them over for another 20 seconds—add a tablespoon of butter to the skillet and your dipped bread then cook until golden brown (approx. 2 minutes to each side)
5. Repeat this process with the remaining bread slices, then set the skillet aside till ready to use again...
6. Now to assemble the sandwiches. Begin by spreading softened butter on the inside of each slice of French Toast; follow that with a thin layer (2 teaspoons) of mustard on 4 slices of toast, and a layer (2 teaspoons) of mayonnaise on the remaining 4 slices...
7. Top the 4 slices with mayonnaise with an equal amount of shaved Gruyere cheese, followed by roast turkey and then the baked ham—top with the final 4 slices of French toast, pressing them together gently...
8. Set your skillet back over medium-low heat and melt 1 tablespoon of the butter...
9. Brush the tops of your Monte Cristo sandwiches with a small amount of the remaining butter and place butter side down, two at a time, for two minutes
10. While cooking brush the top of the sandwiches with butter and when ready flip them over gently, and continue cooking for 2 to 3 minutes more...
11. Repeat with the final two sandwiches, slicing them in half and dusting with a small amount of powdered sugar...

"The Perfect Monte Cristo"

Notes:
1. Serve with real maple syrup or your favorite replacement...
2. Also can be served with Homemade Strawberry preserves (or small batch, farm stand quality) on the side, for a deliciously sweet addition. (Raspberry & Red Currant are also good choices)

"A Rose Tart by any other name would smell as Sweet"

"Vegetable Rose Tart"

Last night, as is my usual modus operandi, I decided to mess around in the kitchen...

Now it's not every day that I make a new dish, and a lot of times I'll make the same thing again and again-because, well, it's good an I liked it enough too...

Sometimes, if I'm trying something different with a dish I've done before, I might post it-like with the Caramelized Apple Almond Galette recently...

"Beauty in the petals of a Rose"

But mostly this week I've been doing various dishes that I've done plenty before-like last nights Lemon Chicken de Provence...

Though for a tasty visual treat I did decide to make for me and my Beautiful baby last night a "Vegetable Rose Tart" with a fresh mozzarella and herb'ed cream base.
Slicing up my Zucchini, Squash and Carrots with a vegetable peeler; I began wrapping them into my Roses...

Then inside the tart pan filled with puff pastry I added my mozzarella, sour cream and some fresh herbs-followed by all of my beautiful Roses...

"Roasted vegetables almost to pretty to eat"


Drizzled a little olive oil, with chopped fresh herbs and garlic, over top it to finish-then into the oven to bake...

Finally while it was cooking, I played around with setting up for the picture; which I got done just as it finished baking...

A couple of pretty pics later and it was finally time to dig in and eat..

Such a beautiful dish in it's presentation and oh so—"Definitely Delish"

"All ready for roasting"


"Vegetable Rose Tart"

Ingredients:
For Pastry Shell:
1 package Dufour all butter Puff Pastry (or your own puff pastry recipe)

"Just one perfect Rose"

For the Filling:
1/2 cup fresh Mozzarella
1/2 Sour Cream
1 tsp Sea salt
1 clove minced garlic
Fresh cracked Pepper to taste
1 tsp mixed Herbes de Provence (2 tsps if using fresh Herbes instead of dry)

For the Vegetable Roses:
1-2 medium Zucchinis
1-2 medium Yellow Squash's
2-4 Carrots (purple and other carrot colors if available)
Quality Olive Oil
1 clove minced garlic
1 tablespoon Fresh thyme and parsley, finely chopped
Sea salt and Pepper to taste

Directions:
For the tart shell:
1. Lightly grease a 8-9 inch loose base tart tin.
2. Roll the pastry out until you have a circle approximately 11 inches and lay it over the tart tin and press into the sides. Place in the fridge for 30 minutes.
3. Preheat the oven to 350 degrees Fahrenheit. Scrunch up a piece of baking paper and open it back up. Place on the tart shell and fill with baking beads.
4. Place in the preheated oven and cook for 10-15 minutes. Remove the beads and cook for a further 5-10 minutes until the base is cooked through.
5. Set aside to cool.

"Vegetable Rose Tart" 

"A beautiful Rose"

For the filling:
1. Chop the mozzarella into small pieces and place in a bowl.
2. Add the sour cream, garlic and mixed herbs then stir until combined.
3. Spread the filling over the base of the tart shell.

For the vegetable Roses:
1. Slice the vegetables into 1/8 inch or thinner slices. (Strips)
2. Preheat the oven to 375 degrees Fahrenheit.
3. On a chopping board, start with a piece of carrot and begin rolling it into a tight curl. Then wrap the Carrot with a piece of Zucchini and then a piece of Yellow Squash. Roll together the 3 vegetables into a rose shape. Place into prepared Tart shell with filling.
4. Continue this process until you have filled the tart with vegetable roses of various sizes.
5. Drizzle the top lightly with olive oil, sprinkle with fresh chopped herbs, finely minced garlic, sea salt and pepper.
6. Transfer the tart into the oven and bake for 40-50 minutes or until the vegetables are cooked and lightly golden. (Alternatively, you could partially pre-roast the vegetable strips before rolling into roses-adjust cooking time accordingly)
7. Serve with a salad for a main course or as a side dish with a main entree of your choice...

"Sunrise"

"Stepping out of my comfort zone with some Chicken Vindaloo"

"Chicken Vindaloo"

Recently I decided to step out of my comfort zone and try a type of cuisine that I never had before; my decision of course was greatly influenced by two amazing, and awe inspiring, women that I've befriended here in the Foodie community...

The incredible Indian inspired dishes that both are always creating, on their own sites, always look so wonderfully delicious that I finally had to take the plunge and attempt one myself...

So in keeping with this, my culinary journey of discovery, I first did a small amount of searching, through various media, to decide on what to choose for my first attempt at Indian Cuisine...

"Chicken Vindaloo"

What I ended up coming across again and again where recipes for "Chicken Tikka Masala"; to me it seems like it is the go to dish for anyone attempting Indian cooking for the first time, and that it's one of those dishes that any non-Indian always orders at a restaurant. Now there's nothing wrong with that of course, but for me, well I just have this need to be a tiny bit different...


It was then that I came across this photo for this wonderful dish, "Chicken Vindaloo" and I knew I had found what I was looking for; now I know what you might say, the origins for this dish aren't strictly Indian — but what the Goan's have done to make this dish their own is truly amazing and I hope that in the creation of my own version of this recipe, that I've honored the traditions of cooking they created...

"Chicken Vindaloo" with fresh "Naan"

So after lots of research, and a big comparison of recipes from all sorts of people and all sorts of sources I learned that this dish has it's roots in a Portuguese dish known as "Vinha de Alhos" which translates as "Wine and Garlic". You see; Goa was for a long long time a colony of Portugal and as such the transfer of cuisine, culture, religion and architecture flowed back and forth constantly between them. This dish is one such item, and a tasty one at that...

Another item of note before I get on to the good stuff. (The Recipe
I've made this several times now and have fluctuated back and forth between using potatoes or not. I have enjoyed it both ways so I've included it as an option; but I was amazed to find out that besides being used as a way to stretch out the dish due to the expense of meat (potatoes are of course cheaper), but that it was partly due to a corruption and mistranslation of the name...

You see; the Portuguese dish "Vinha de Alhos" became over time "Vindalho" which finally became "Vindaloo" and funny enough "Aloo" is the Hindi word for "Potato"—what's the chance of that, right...

Regardless, though, whether you use potatoes or not, my recipe or a family favorite—this dish is, most assuredly, "Definitely Delish"

"Delicious Chicken Vindaloo"

"Chicken Vindaloo"

Ingredients:
For Chicken and Base:
3-4 Skinless Chicken Breasts, cut into pieces
17 ounces chopped cooked Tomatoes
1-2 tablespoons Tomato Paste
1 Red Onion, finely chopped
1 small Sweet Onion, finely chopped
6 cloves of Garlic
2 tablespoons Olive Oil
4-5 small gold potatoes, halved (optional, see Notes)
2-3 tablespoons flour
Sea Salt and Ground Pepper, to taste

For Vindaloo Spice:
1 tsp ground Cumin
1/2 tsp ground Turmeric
2 teaspoons Garam Masala
1 tsp Mustard Powder
1 tsp ground Coriander
1/2 tsp cayenne pepper (or 3 red chiles, finely chopped)
1/4 tsp ground Cinnamon
1/4 tsp ground Cloves
1 tsp Sugar
1/2 tsp Paprika
1 inch square fresh Ginger, finely grated
6 tablespoons White Wine Vinegar 

"Rice, Spinach, Hummus and Chicken"

Directions:
1. In a bowl; add all of the ingredients for the Vindaloo Spice blend, stir together and set aside till needed—then pre chop your onions and garlic so that they're ready...
2. Rinse, pat dry and slice Chicken Breasts into pieces and toss with flour—then sprinkle with a tiny bit of salt and pepper...
3. Pre-heat deep sided sauté pan or pot on medium high heat. Add 1 tablespoon of Oil, the Chicken and then cook to brown & sear on the outside, approximately 5 minutes. Remove Chicken from pan and set aside loosely covered in foil...
4. Reduce heat to medium (or medium low depending on stove top) and add the additional tablespoon of Oil as well as the Garlic and Onion, sautéing till softened—about 5-7 minutes. (be careful not to burn)
5. Stir in the tomato paste with the onion and garlic, cook for 1 minute— then add the tomatoes, Vindaloo spice, Chicken and Potatoes (if using).
6. Stir well and cover, bringing the mixture to a boil—then reduce heat to low and simmer for about 30 minutes. Be sure not to let the Chicken dry out, adding water a 1/4 cup at a time only if necessary...
7. When the chicken is cooked through and the potatoes (if using) are tender, taste, adding Sea Salt and Pepper if needed...

"Tasty Indian Vindaloo"

Notes:
1. Potatoes are optional, have done both with or without. When using baby golds and reds are good, I especially like these French sweets available by me as it cuts some of the heat nicely...
2. Serve with oven warmed Naan bread and some sides, Pilau Rice or some other Indian inspired dishes...
3. This is a little less spicy version then some I've seen; but, if you prefer it to be even more so—just add additional 1/4 tsp's of cayenne, cinnamon or red pepper flakes...
4. I served my dish with both a Rice and Couscous; as well as a Scallion Pepper Spinach dish, a Mint & Cumin Yogurt sauce, Harissa Hummus and Naan bread...

"Look under recipes for additional Side Dishes to use alongside the Chicken Vindaloo" 


"Pastelitos for all Occasions"

"Sweet & Savory Pastries"

"Sweet & Savory Pastries"


So recently I played around with this wonderful pastry recipe that had been floating around in my head for more than a little bit...

So good and so tasty"

So good and so tasty"

This of course was the "Pastelitos" or Cuban Pastries I made and posted not so long ago...


Of course, at the time, I had only done the one version (Inspired by the movie "Chef" in no small part—definitely watch it if you haven't yet); it was a sort of mini Cubanos sandwich pastry which I just loved for it's scrumptious mix of savory and sweet...

This time, though, I decided to go all out and create a veritable multitude of "Pastelitos Pastries" to bring in to work. (As well as a few for friends & family to enjoy at home)

"Hard at work making some Good Eats"

"Hard at work making some Good Eats"


So to get down to the details, and without any further ado, I give you my four delectable and delicious Cuban Puff Pastries....

Pastelitos de Carne, Queso, Cubanos and Nutella Queso...

Each different but equally wonderful; from the sweetened cream cheese filling off the one to the savory meaty picadillo filling off another. (Love the capers and pimento stuffed olives mixed in–Yum)

"Love the sweet outer shell of puff pastry"

"Love the sweet outer shell of puff pastry"

Everyone ate them up lickety-split and now are constantly asking when I'm bringing in more for them. (I think it's the sugary syrup coating on top of each–I could eat that all day)


Such a wonderful, easy and enjoyable dish to make and share and oh so—
"Definitely Delish"


"Cubanos style"

"Cubanos style"


"Pastelitos"

Ingredients:
For Puff Pastry:
10 ounces unsalted Butter
1/2 cup cold water
1 teaspoon fine Sea Salt
2 cups all-purpose flour

For Simple Syrup:
1/2 cup white sugar
1/2 cup water

"Various fillings-from meat to sweet"

"Various fillings-from meat to sweet"

For Egg Wash:
3 eggs, beaten
2 ounces water

For Filling:
Nutella
2 (8 ounce) packages Cream Cheese
1 teaspoon Lemon juice
1/4 cup white Sugar
2 tablespoons Milk
(see notes for other options)

Boxing them up as I go"

Boxing them up as I go"

Directions:
For Puff Pastry:
1. Cut 8 ounces (2 sticks) butter into 1/2 to 1/4-inch dice, place on a plate and refrigerate while preparing remaining ingredients.Measure water and add salt; stir to dissolve and set aside...
2. Coarsely dice remaining 4 tablespoons (1/2 stick) butter. Place flour in work bowl of food processor fitted with metal blade; add 4 tablespoons butter and pulse until butter is absorbed -- about ten to twelve 1-second pulses...
3. Add remaining butter and pulse once or twice to distribute. Add water and pulse 3 or 4 times, just until dough forms a rough ball. Do not over-process...
4. Flour work surface and scrape dough from work bowl. Shape dough into a rough rectangle and place between 2 pieces of plastic wrap. Press dough with rolling pin to flatten, then roll back and forth several times with rolling pin to make a 12 by 18 inch rectangle of dough...
5. Peel away plastic wrap and invert dough to floured work surface. Peel away second piece of wrap. Fold dough in thirds in the width, folding the top third down and the bottom third up, to make a 6 by 18-inch rectangle, then roll up the dough from one of the 6-inch ends, making sure to roll end under dough...
6. Press the dough into a square, wrap in plastic and refrigerate 1 hour, or until firm...

"So yummy and delicious"

"So yummy and delicious"

For Pastelitos:
1. Pre-heat oven to 350 degrees Fahrenheit; then prepare simple syrup by mixing water and sugar in a small saucepan and bringing it to a boil, then lowering the temperature to low and simmering for 5 minutes-afterwards remove from heat and allow to cool...
2. For the Cream Cheese mixture; take two packages of cream cheese at room temperature. Then with an electric mixer, mix in two tablespoons milk and lemon juice and blend until smooth. Gradually add sugar and continue mixing until fluffy...
3. Now take the sheet of puff pastry you've constructed and cut it into shapes; circles, triangles, squares or whatever you like...
4. For cream cheese filled add a small amount of the cream cheese mixture to the center of each piece of puff pastry...
5. For the Nutella and sweetened cream cheese filled; add a small amount of nutella (best if you've pre-measured onto wax paper in heaping teaspoons and frozen in freezer), followed by a heaping tablespoon of cream cheese mixture...
6. Moisten the edges of the dough strips with a little water. Cover each filling covered piece of dough with the remaining two dough pieces. Seal the edges on all sides of the dough by pressing and smoothing gently with your hands...
7. Brush the top with an egg wash (3 eggs beaten with 2 ounces of water), then bake in the oven for 30 to 40 minutes -- pastry should be crisp on top and lightly browning...
8. Remove the pastries from the oven and brush with the simple syrup (recipe above). Return to oven and bake an additional five or six minutes...
9. Let cool slightly, and then enjoy...

"Definitely can not get enough of that deliciously sweet dough"

"Definitely can not get enough of that deliciously sweet dough"

Notes:
1. You can make all sorts of other filling types for  meat filled, cuban sandwich style (which I've done) and any and all sorts of other interesting ideas-be creative and have fun with it...